Mango froyo bars are a perfect way to store the mangoes even after the season is over. With a tinge of cardamom powder and sprinkled with pistachios, these are super simple to prepare and makes for a quick refreshing dessert.
Ingredients:
Mango puree – 1 cup
Thick Yogurt – 1 cup
Carrdamom powder – 1/4 tsp
Sugar – 2 tbsp (optional) or honey
Crushed pistachois – 2 tbsps
Preparation:
Wash and peel the mangoes and dice them. Blend them well in a mixie and puree it. Keep it aside.
Line a baking tray with parchment paper. You could also use cake pan, if you have.
Next, in a blender, add 1 cup of the mango puree, cardamom powder, yogurt and sugar or honey. You can adjust the sugar according to the sweetness of the mangoes.
Blend it well and pour this mixture into the tray lined with parchment paper. Gently, shake the tray so that the mixture is spread evenly.
Sprinkle it on top with crushed pistachois and freeze them for 4 to 5 hours. After 4 hours, check if it frozen well, remove and cut it into squares and serve.
A no gelatin, no agar-agar and a no-egg cheesecake which is creamy, silky and smooth. This no-bake decadent dessert consists of a base made from crushed digestive biscuits and another layer of cream cheese and mango puree.
Makes 15 cupcakes
Add biscuits and butter base to the cucake liners and press it firmly
Beat the whipping cream until peaks form
Combine the whipped cream, cream cheese and mango puree
Spoon the mixture into the cupcake liners and freeze
Ingredients:
For The cheesecake:
Cream Cheese (full fat) – 300 g (room temperature)
Thick yogurt/Greek yogurt – 1 cup
Powdered sugar – 1/2 cup
Lime juice – 1 tbsp
Mango puree – 1 cup
Whipping cream – 1/2 cup
For the base:
Digestive biscuits – 190 gms
Melted unsalted butter – 1/3 cup
For topping:
Cubed mango – few
Mango puree – 2 – 3 tbsp
Mint leaves – a few
Preparation:
For the base :
In a vessel, place the biscuits and break it into pieces. Transfer them to a pulser and run it once until you get fine crumbs. Transfer it to the vessel again and add the melted butter to it and mix well.
Meanwhile, place the muffin liners in the muffin pans. Transfer the biscuits crumb and butter mix equally among the 15 muffin pans and press it until they are compact.
Mango:
If you are using fresh mangoes, take the flesh off 2 mangoes and puree them in a pulser to a smooth paste. Keep aside 1 cup for the cake and around 3 tbsp for the topping. If you are using a store bought canned mango puree, take 1 cup of it and add lime juice and blend until smooth.
For the Cream cheese:
Place the cream cheese in a bowl. Add powdered sugar to it and yogurt and mix it well using a whisk or an electric hand-held mixer. Then, add the mango puree and mix well again.
For the Whipped Cream:
In another mixing bowl, prepare whipped cream as per the instructions on the packet (I added 1/2 cup of cold milk to one sachet of whip mix powder and beat it well for about 5 minutes until stiff peaks form).
Assembling:
Gently, fold the whipped cream into the cream cheese mango mix until it combines well. Do not mix too much.
Fill in the muffin cups with this mixture using a spoon carefully. Smooth out the top using a small spoon/spatula and shake the muffn pan to allow the mixture to settle in. Place it in the freezer for 3 hours or more until they are firm.
Remove the muffin liners and transfer it to a serving plate. You may spoon some mango puree on top of the cupcakes, add 1 or 2 mango cubes on each of the cup cakes and decorate it with a mint leaf. Tastes best when served as it slightly starts to melt. Remove it from freezer and wait for 5 minutes before you serve.
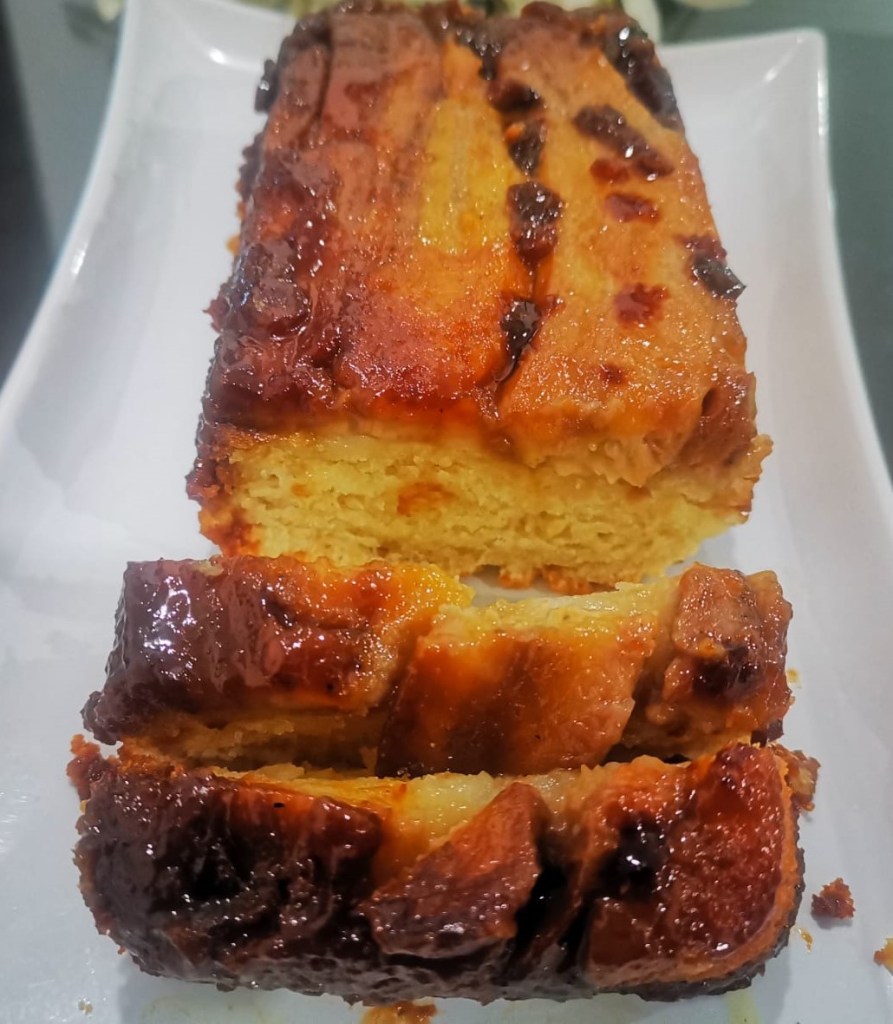
These caramelised bananas with luscious gooey caramel sauce with a moist cake will make anyone drool. The best use for your ripe bananas.
Makes 2 cakes in the loaf baking pans.
Slice the bananas and arrange legthwise
Mix the flour gently
Pour the batter into the baking pan
Ingredients:
For caramelizing the bananas:
Bananas large – 3
Light brown sugar – 1/3 cup
Unsalted butter – 1/4 cup
Salt – 1/4 tsp
For the Cake:
All purpose Flour/Maida – 1 1/2 cups
Salt – 3/4 tsp
Baking powder – 1 1/2 tsp
Sugar – 1 cup
Any vegetable oil – 1/2 cup
Vanilla extract or essence – 2 tsps
Egg – 1 large + 1 yolk
Buttermilk – 1 cup (room temperature)
Preparation:
Preheat oven to 350 F or 175 C.
Start by melting the butter in a skillet or kadai on low heat. Add the light brown sugar and salt and stir until it melts. Once it is caramelised, remove from the heat and set aside.
Grease 2 loaf baking pans and pour the caramelised sugar into both the pans equally. Now, place the bananas (as shown in pic) flat side up and round side down.
In another mixing bowl, combine flour, baking powder and salt and set aside.
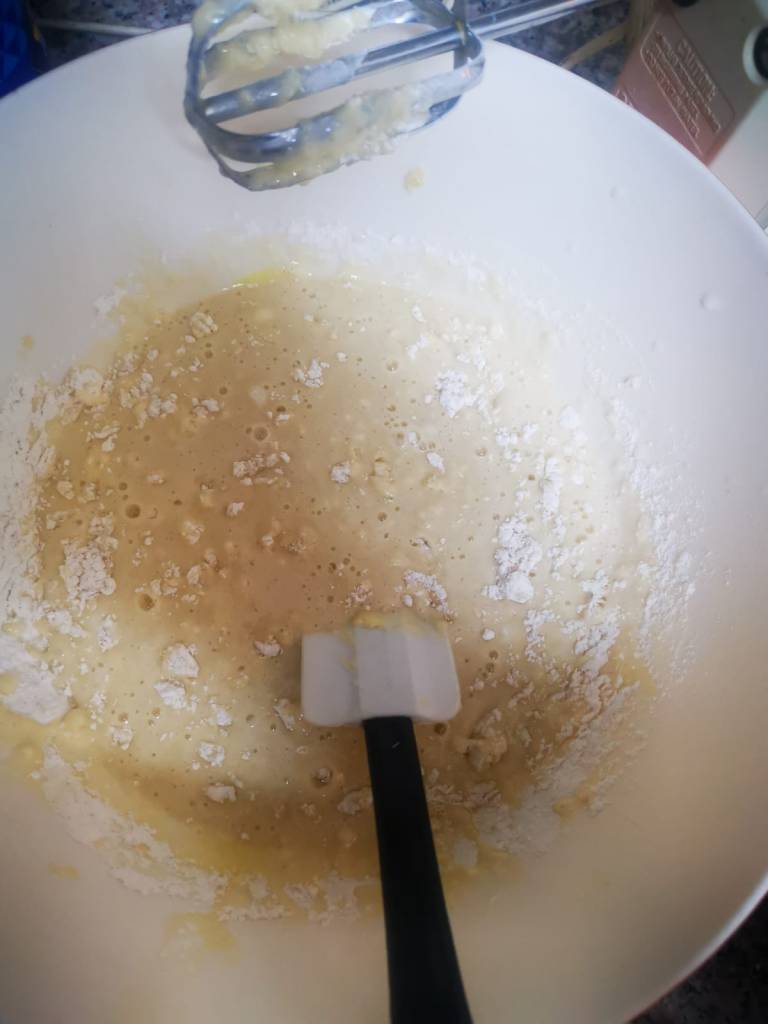
In a wide bottomed pan, place the sugar, oil and vanilla essence in a bowl. Whisk to combine. You may use an electric hand mixer for the same, if you wish. Then add the egg and the yolk and beat well. Next, add the buttermilk and whisk again.
Now add the flour mix to this wet mixture using a spatula gently. Do not mix it too much.
Pour this batter on top of the bananas and smoothen the top.
Bake for 50-55 minutes until it is cooked. Insert a tooth pick to see if any batter is sticking to it. If it comes out clean, the cake is cooked.
Run a butter knife gently around the pan. Let it sit for around 15 minutes until the caramel settles a bit. Now carefully, invert the cake onto a serving platter.
Serve it with vanilla ice -cream or whipped cream.
A crunchy topping on the hot fudge pudding cake makes it outrageously yum…..A simple batter spooned to the bottom of the pan, a dry cocoa mixture sprinkled on top of it and hot water poured on top if it and baked and voila….. a yum dessert ready to be served.
8 – 10 servings
Ingredients:
All purpose Flour or Maida – 2 cups
Salt – 1 tsp
Sugar – 1 cup sugar
Baking powder – 4 tsp
Cocoa – 3 tbsp
Melted butter – 4 tbsp
Milk – 1 cup
Vanilla essence – 2 tsp
Chopped Walnuts – 3/4 cup (optional)
For Topping:
Sugar – 1/4 cup
Brown sugar – 1 cup
Salt – 1/4 tsp
Cocoa – 1 tbsp
Boiling Water – 1 cup
Pour boiling water on top and bake
Preparation:
In a mixing bowl, add the flour, baking powder, salt and cocoa.
In another bowl, add sugar, melted butter, milk, vanilla essence and beat it well using a electric hand mixer.
Now add the flour mixture and walnuts (optional) and beat it at low while mixing the flour. You can use a spatula to mix it gently.
Grease a 9 inch glass pyrex baking dish and spread this mixture into it and set aside.
In another mixing bowl, combine the toppings (sugar, brown sugar, salt and cocoa). Mix it well and sprinkle it on top of the batter. Do not stir/mix it into the batter.
Pour the boiling water on top and do not stir.
Preheat oven to 180 C or 350 deg F . Place the baking dish inside the oven and bake for 80 minutes or until it is set. The cake will rise and you will see a pudding form at the bottom of the dish.
It is recommended to serve it warm with a scoop of vanilla ice-cream.
This is a classic British dessert made with dates. A rich, sticky pudding doused with an indulgent toffee sauce will make your taste buds sing.
Ingredients:
Dates (Pitted and finely chopped) – 10
Baking soda (Bi-carbonate of Soda)- 3/4 tsp
Boiling water – 3/4 cup
Vanilla essence – 1/2 tsp
Softened butter – 6 tbsp
Eggs (large) – 2
All purpose Flour/Maida – 1 1/4 cup
Light brown sugar – 1/2 cup
Salt – 1/4 tsp
Baking powder – 1 tsp
Pecans/Walnuts chopped – 1/4 cup (optional)
Sauce:
Light brown sugar or Dark brown sugar – 3/4 cup
Butter – 8 tbsps
Heavy whipping cream – 1/2 cup
Kosher Salt or any salt- a pinch
Preparation:
Preheat oven to 350 F or 180 C. Lightly grease a 8 x 8 inch pan or 6 individual ramekins with butter/cooking spray.
In a bowl, stir together the dates, boiling water, baking soda and vanilla extract. Let the mixture sit for 15 to 20 minutes. Pulse it once in the mixer and keep it aside.
In another bowl, cream the light brown sugar and butter with a handheld mixer until it is combined well. Then, add the eggs and mix well.
In a mixing bowl, add the flour, baking powder and salt. Mix it well. Add this to the wet sugar butter mixture and fold it lightly, until it is well combined.
Then, add the dates mixture and the chopped nuts to this mixture and fold it with a spatula. Do not overmix or beat it with an electric beater.
Spread the batter evenly on the 8 x 8 inch pan or spoon into individual ramekins.
For an 8x 8 inch pan, bake it for 40-45 minutes until a toothpick inserted into the centre, comes out clean. Let the cake cool completely. For individual ramekins, baking time of 30 minutes should suffice.
Preparing the sauce:
Combine sugar, butter and salt in a pan and keep it on low heat. After about 3 minutes, when the sugar dissolves, add the heavy whipping cream and stir for another 2 minutes. The sauce should become smooth and silky.
Remove the cakes from individual ramekins and place it on individual plates. Drizzle the sauce over it. You can sprinkle pecan or walnuts on top of it. If you have baked in an 8 x 8 inch pan, cut square pieces of the cake and serve it on a plate.
You may also serve it with a scoop of vanilla ice cream on top.
Though I have made this a couple of times, every time we crave for more and have requests for additional batches to be baked. It is so damn good and worth every calorie and the best part is, it is quick to make with just 5 ingredients.
Ingredients:
Brown Sugar – 1 cup
Maida/All purpose flour – 1/2 cup
Softened Butter – 2/3 cup
Chopped walnuts – 1 3/4 cups
Eggs – 2
Preparation:
In a mixing bowl, add the flour, brown sugar and chopped walnuts and stir well.
In a separate bowl, beat the butter and eggs together. Add the ingredients in the other bowl (flour, brown sugar and walnuts) into this and combine well.
In a muffin pan, line it up with muffin liners. Spoon batter into it filling only 3/4 of the cup as it will rise to bake.
Preheat oven to 180 degree celsius and bake for 20 minutes. Insert a toothpick to see if it comes out clean. If batter sticks to it, bake it for another 2 minutes. Pop it out when done.
You may drizzle caramel or chocolate sauce over it and serve.
Note: You may also use pecan nuts if you do not have walnuts.
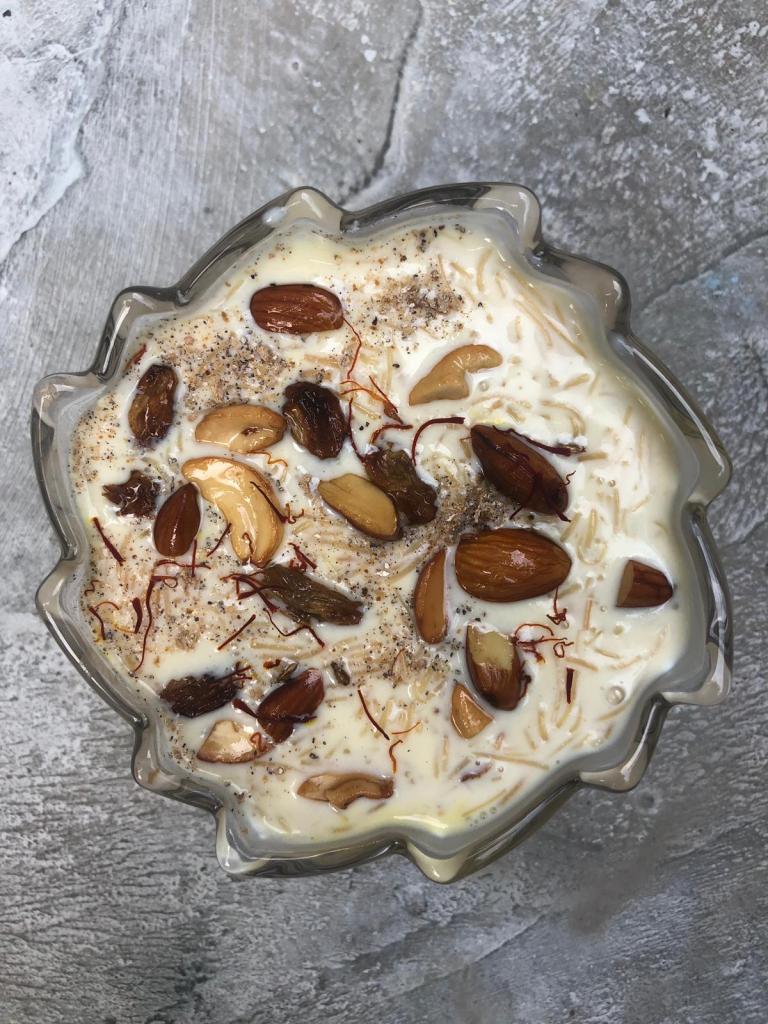
A light and tasty milk kheer which can be served after a meal. Often served during festivals, this is a staple in many households.
Semiya
Thin Vermicelli
Ingredients:
Semiya/Thin Pakistani Vermicelli -1/2 cup
Milk – 500 ml
Sugar – 1/2 cup
Cashewnuts roasted – 5 or 6 pieces
Almonds/badam – 4 or 5 pieces sliced
Saffron – 2 strands
Cardamom powder – 1/4 tsp
Ghee – 1 tbsp
Preparation:
In a pan, add ghee and roast the almonds, cashew and the raisins until it pufs up. Remove and Keep aside 3 almonds and 3 cashewnuts for garnishing.
Heat ghee in a pan. Add the semiya or vermicelli into the pan and saute it well. Take it off and keep it aside. Then add milk to the pan, turn the flame to medium and let the milk simmer for some time about 10 minutes so that it becomes a bit thick. Keep stirring in between so that it does not get burnt. Then, add the semiya to it and stir again. Let the semiya cook in the milk until soft. Keep the flame on low. Once the semiya is cooked, add the sugar, cardamom powder, rest of the cashewnuts, almonds, saffron and stir it once. Turn off the heat and let it cool.
The semiya may absorb milk as it gets thicker and starts to cools down.
Note: Some of them add 1/4 cup of condensed milk for a thicker and creamier payasam.
Wash the oranges and cut 1/4 of the oranges from the top and keep the top and the oranges separately. Also, cut a sliver from the bottom so that the oranges stand firm. Freeze the scooped out oranges for 2 hrs.
Using a knife, scoop out the insides of the orange. Collect the juice and the pulp in a bowl. Pulse this alongwith honey, lime juice, orange zest and water until smooth, in a blender.
Pour the puree into a broad flat pan or broad flat bottomed plastic container and place it in freezer. Every 30 minutes, scrap with fork to break the ice. Repeat 4 times upto 2 hrs.
When you are about to serve, remove the frozen granita and scrap it again and scoop it into the orange shells. Serve garnished with mint or cream.
An ultra rich, creamy and smooth ice cream perfect for summer. The chocalatey flavour is definitely satisfying and worth a try. You cannot taste the avocado and is a hit with children too….
Peel and chop the avocado. Add it to a blender alongwith the condensed milk. Pulse on high until it is smooth and creamy. Now add the cocoa powder and blend it again until smooth. Empty the contents into a large mixing bowl.
Empty the dream whip sachet in a bowl and add 1/2 cup cold milk to it. Whip on high speed for about 10 – 15 minutes until stiff peaks form. Gently fold in 1/2 of the avocado mixture with a spatula and then slowly, fold in the other 1/2 of the mixture. Make sure you don’t fold in too fast to maintain the air inside that was whipped in.
Pour the mixture into a 9×5 inch loaf pan and freeze for 8 hours until solid.
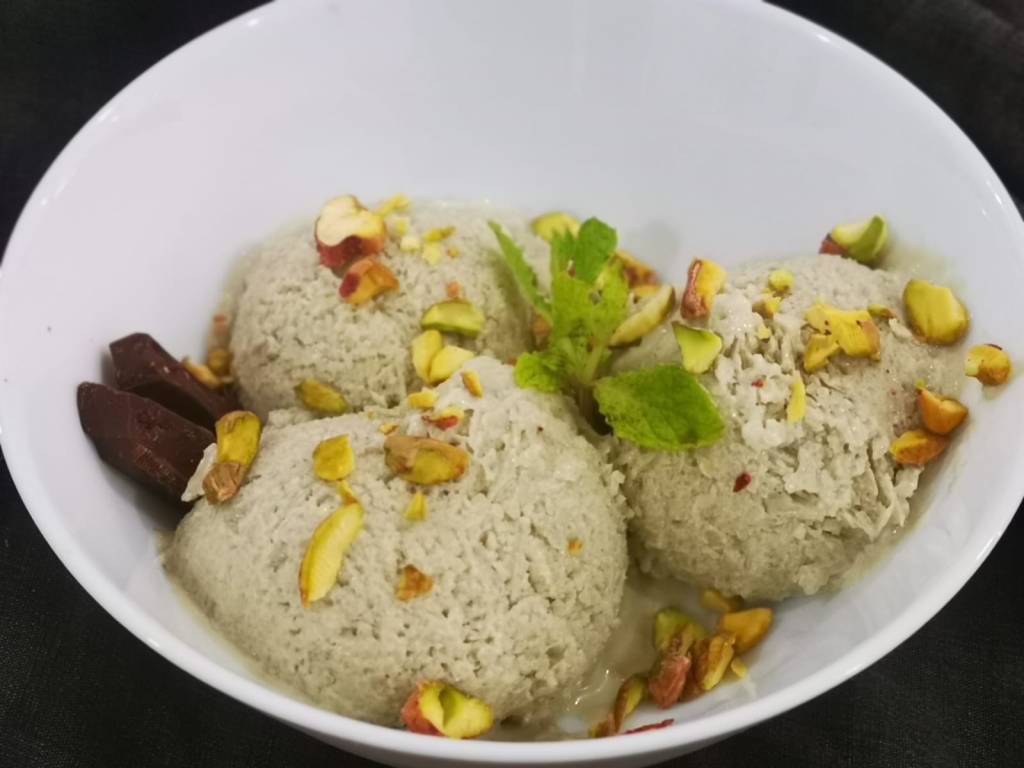
An healthy and easy home made ice-cream which tastes amazing. It can be made in a jiffy and you do not need an ice-cream maker to make this.
Ingredients:
Full fat coconut milk can – 1/2 can or 200 ml
Avocado – 1
Ripe long banana ( pref. Chiquita or Del monte) – 1/2
Honey – 3 tbsp (add more if u want it sweeter)
Lime juice – 1/2 tsp
Preparation:
Cut the bananas and freeze it for 30 minutes.
Chill the pan in which you are going to pour the ice cream, for 1 hr in the fridge.
In a blender, add the peeled and cut avocados, coconut milk, bananas, lime juice, honey and blend until it is smooth and creamy.
Pour it into the chilled pan immediately and cover it with cling film and freeze it for 6 hours. Make sure the cling wrap touches the top of the ice cream so that it doesn’t get discoloured. Also, every 1/2 hr, make sure to take it out and beat it again with an electric hand beater. Repeat this procedure thrice. This is also to prevent formation of ice crystals.
Serve when it slightly starts to melt, garnished with toasted pistachois or almonds.
This ice-cream does not store well. So, make as much as you want only and enjoy.